

What is Kubernetes?
Why Kubernetes? What problems does it solve?
Features of container orchestration tools
Kubernetes Basic Architecture
Basic concepts
Configuring the Kubernetes cluster
What is Kubernetes?
Kubernetes is an open-source container orchestration framework, which was originally developed by Google.
On the foundation, it manages containers, like Docker containers 🐳 or some other container technology, which basically means that Kubernetes helps you manage applications that are made up of hundreds or maybe thousands of containers. It helps you manage them in different environments like physical machines, virtual machines or cloud environments, or even hybrid deployment environments.
Why Kubernetes? What problems does it solve?
- What problems does Kubernetes solve and what are the tasks of a container orchestration tool?
To understand that better, let's see how the need for an orchestration tool evolved:
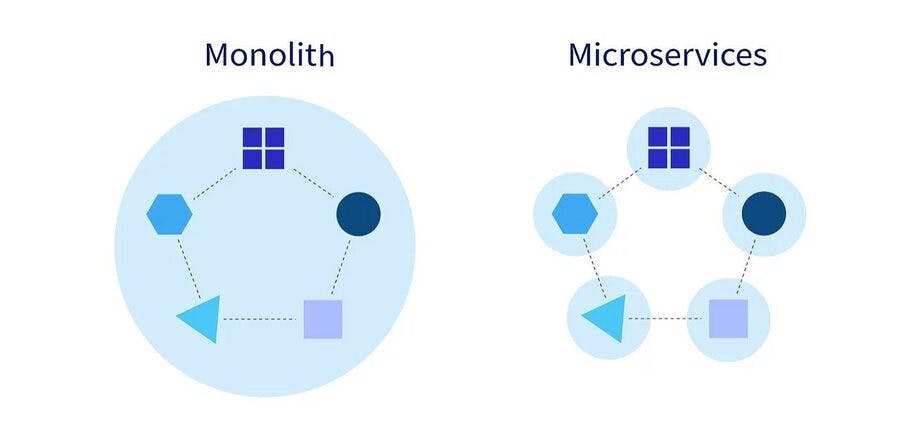
Trend from Monolith to Microservices
Increased usage of containers
Managing those hundreds or thousands of containers
The rise of microservices caused an increased usage of container technologies because the containers offer the perfect host for small independent applications like microservices.
This rise of containers and the microservice technology resulted in applications composed of hundreds or even thousands of containers. Now managing those loads of containers across multiple environments using scripts and self-made tools can be really complex and sometimes even impossible. & That specific scenario actually caused the need for having container orchestration technologies.
Features of container orchestration tools
Orchestration tools like Kubernetes guarantee the following features:
- High availability
In simple words, high availability means that the application has no downtime so it's always accessible by the users
- Scalability
Scalability means that application has a high performance, it loads fast and users have very high response rates from the application
- Disaster Recovery
Disaster recovery basically means that if an infrastructure has some problems like data is lost or the servers break down or something unexpected happens with the data center, the infrastructure has to have some kind of mechanism to pick up the data and restore it to the latest state so that the application doesn't actually lose any data and the containerized application can run from the latest state after the recovery.
These are functionalities that container orchestration technologies like Kubernetes offer.
Kubernetes Basic Architecture
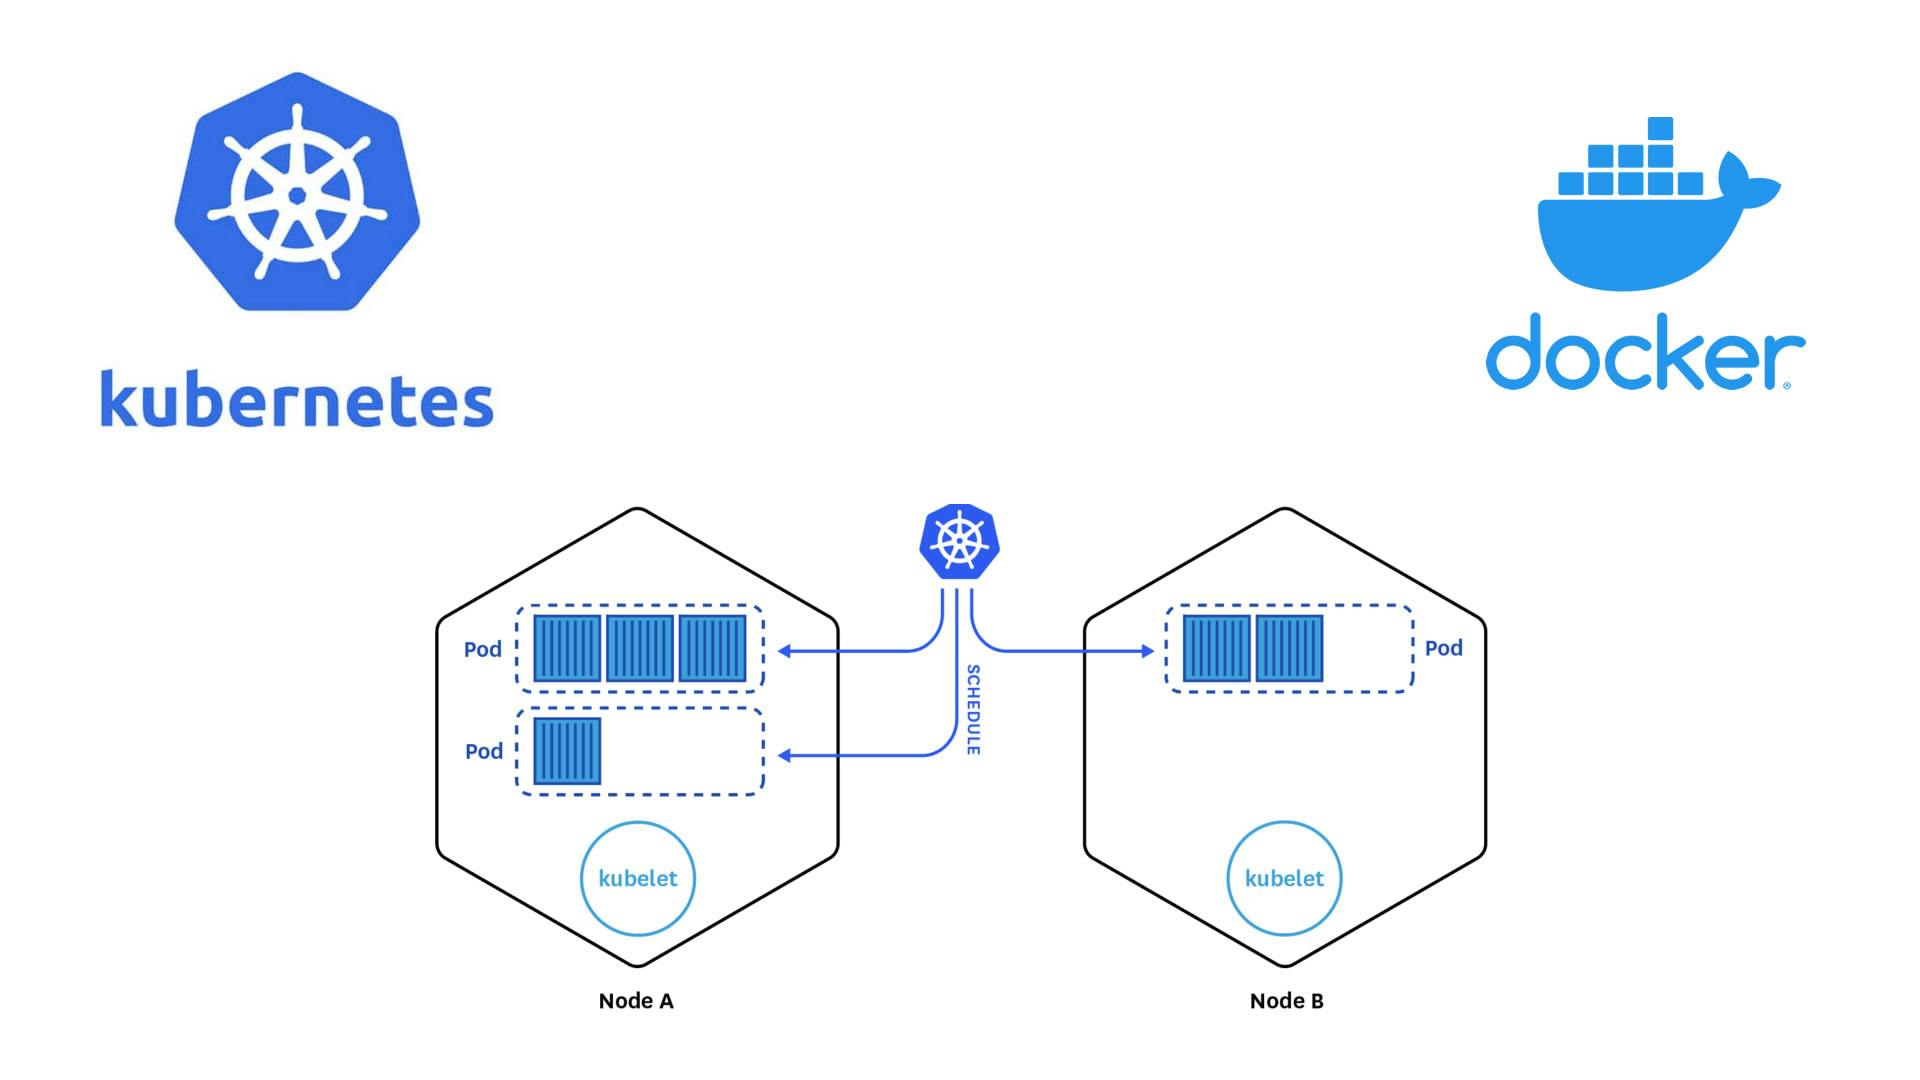
In general, Kubernetes is formed by a cluster of servers, called Nodes, and at the highest level, there exist two kinds of those servers, a Master and a Worker.
The cluster must have at least one Master Node. Connected to the Master Node you have a couple of Worker Nodes, where each Node has a Kubelet process running on it.
- Worker Node
Kubernetes Nodes that do the actual work, are Worker Nodes. Each Worker Node has Docker containers of different applications deployed on it. Depending on how the workload is distributed you would have a different number of Docker containers running on Worker Nodes. So on Worker Nodes, the actual work is happening, it is where your web applications, database, and other services run.
- Kubelet- the primary "node agent"
A Kubelet is actually a Kubernetes process that makes it possible for all cluster nodes to communicate with each other and execute tasks on Worker Nodes, like starting a web application container or database containers.
- Master Node
The Master Node runs several Kubernetes processes that are absolutely necessary to manage the cluster properly. These processes are:
• API server
• Controller Manager
• Scheduler
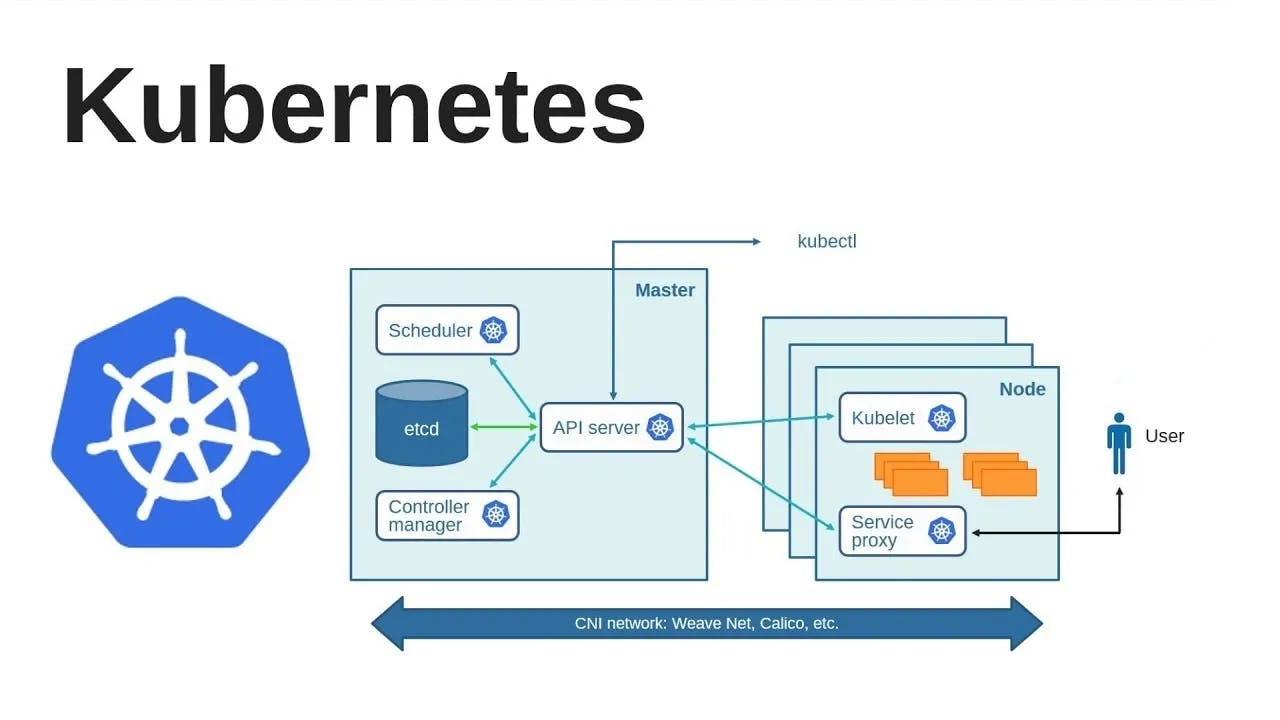
- API server
The first one is an API server, which also is a container. An API server is the entry point to the Kubernetes cluster. It is the process, to which the different Kubernetes clients will talk to Kubernetes clients are:
• UI - when using Kubernetes dashboard
• API - when using scripts and automating technologies or
• CLI - Kubernetes command-line tool (kubectI)
All of these clients communicate with the API server.
- Controller Manager
The Controller Manager keeps an overview of what is happening in the cluster. Whether something needs to be repaired or maybe if a container died and it needs to be restarted.
- Scheduler
Scheduler is responsible for scheduling containers on different Nodes based on the workload and the available server resources on each Node. Scheduler is an intelligent process that decides on which Worker Node the next container should be scheduled, based on the available resources on those Worker Nodes and the load that the new container needs.
- Etcd
Etcd is Kubernetes's backing store and a very important component of the whole Kubernetes cluster. etcd is a key value storage, which holds at any time the current state of the Kubernetes cluster. It stores all the configuration data and all the status data of each Node and each container inside of that Node. Since Eted is such an important component, it can also be hosted outside the cluster on non-cluster servers and managed there separately.
The backup and restore is made from these etc snapshots. Using that etcd snapshot you can recover the whole cluster state.
Together, these 3 processes and the etcd store make up the so-called control plane. To sum up, the control plane is responsible for making decisions about the cluster and pushing it toward the desired state.
- Virtual Network
Last but not least also a very important component of Kubernetes, which enables the communication between Worker Nodes and Master Nodes is the virtual network that spans all the Nodes that are part of the cluster.
In simple words, a virtual network turns all the Nodes inside of the cluster into one powerful machine that has the sum of all the resources of individual Nodes.
- Server Resources - Master vs. Worker Node
One thing to be noted here is that Worker Nodes need much more resources compared to Master Nodes. Which is logical, because the Worker Nodes have the actual work of running the applications therefore have the most load. They can run hundreds of containers inside of them, whereas Master Nodes run just a handful of Master processes.
However, Master Node is much more important than the individual Worker Nodes: If for example you lose a Master Node access you will not be able to access the cluster anymore and that means that you absolutely have to have a backup of your master at any time.
In production environments usually you would have at least two Masters inside of your Kubernetes cluster. In most cases of course you will have multiple Master Nodes, where if one Master Node is down the cluster continues to function smoothly.
Basic concepts
- PODS
In Kubernetes, all containers exist within Pods.
Pod is the smallest unit that you as a Kubernetes user will configure and interact with. Think of a Pod as a wrapper over a container. On each Worker Node you have multiple Pods and inside of a Pod you can again have multiple containers.
However, the best practice is to have one Pod per application. A database for example would be one Pod, a message broker would be again its own Pod and your own java application would be its own Pod as well. The only time you would need more than one container inside of a Pod is when you have a main application, like Mysql database, that needs a helper container, that collects the logs or does backups of the database.
The virtual network, mentioned above, which spans the Kubernetes cluster, assigns each Pod its own IP address and port range.
Thereby, each Pod becomes its own self-containing server with its own IP address.
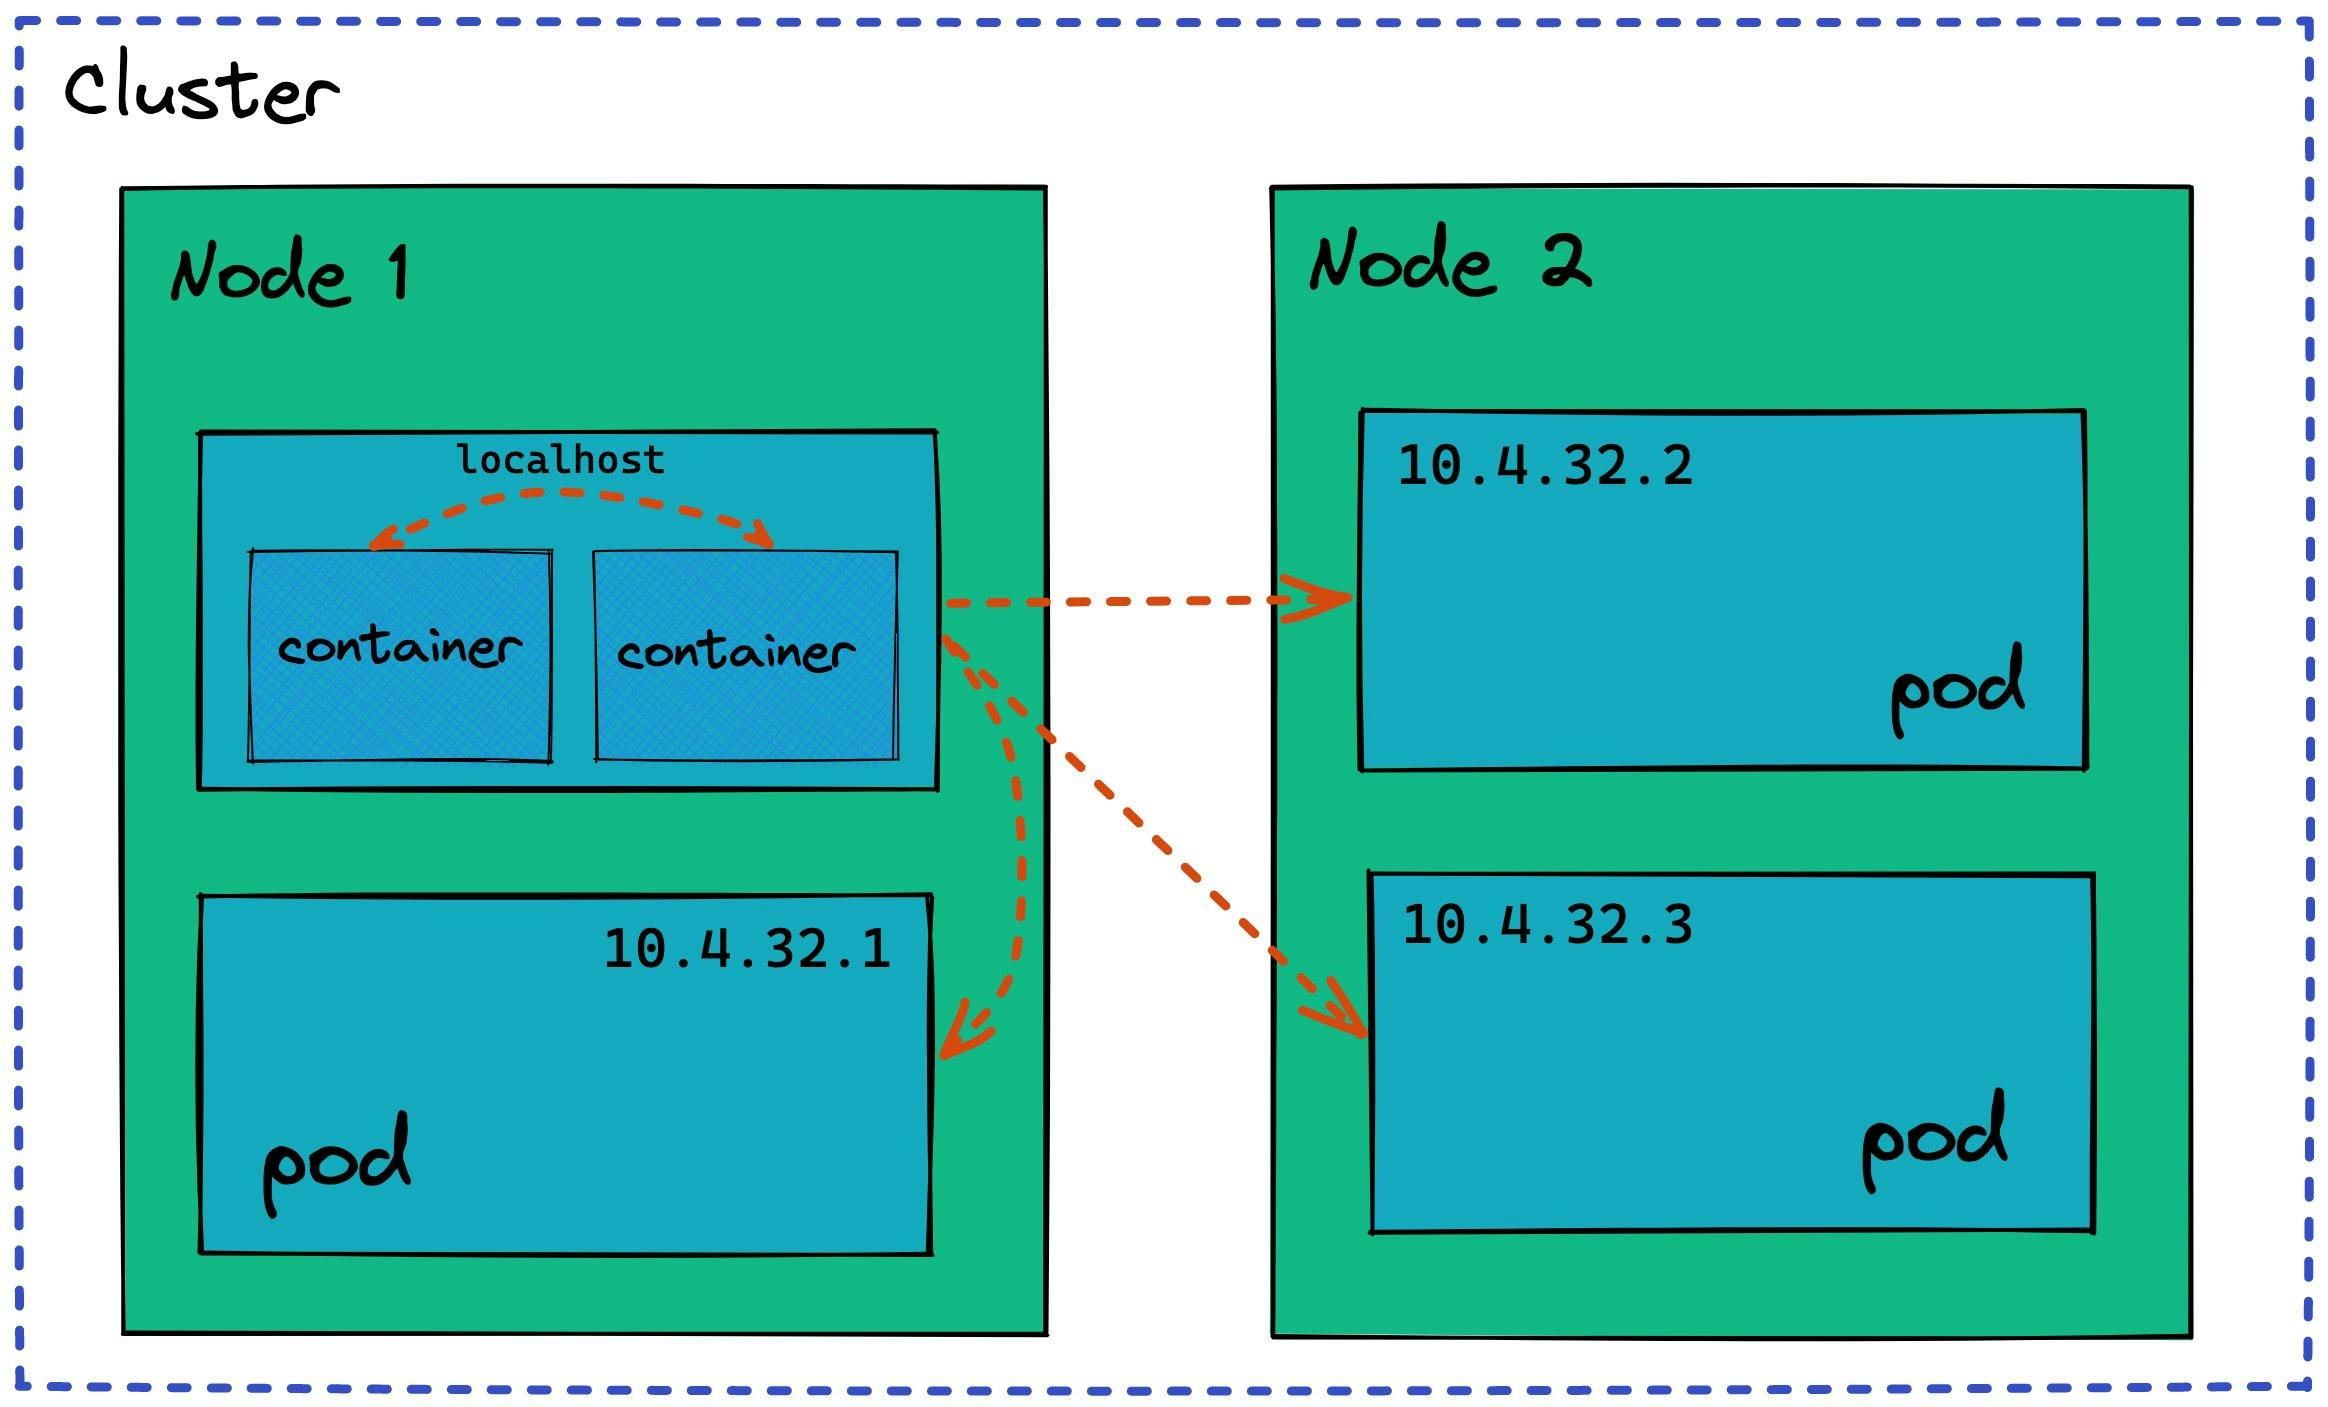
Using this internal IP address the Pods can communicate with each other.
We don't actually configure or create containers inside of Kubernetes cluster but we only work with the Pods, which is an abstraction layer over containers.
Pod is a component of Kubernetes that manages the containers running inside itself without our intervention. This means for example if a container stops or dies inside of a Pod it will automatically be restarted inside the Pod.
- SERVICES
Pods are ephemeral components, which means that Pods can die very frequently. Whenever a Pod crashes and a new Pod is created in its place, it gets a new IP address.
Therefore, if your Java application is talking to a Mysql Pod using the IP address of the Mysql Pod, you would need to adjust the endpoint when the Mysql Pod restarts. Obviously, it would be very inconvenient to adjust that IP address every time the pod dies and restarts.
Because of that, we use another Kubernetes component called Service, which basically is an alternative or a substitute to those Pod IP addresses. So, instead of having these dynamic IP addresses, Services provide a persistent static IP address. And the way it works is, each application Pod gets its own Service sitting in front of it, to handle the communication with other pods.
Now if a Pod behind the Service dies and gets recreated the Service stays in place, because its lifecycle is not tied to the lifecycle of the pod.
The Service has two main functionalities. One is providing a static IP address. And second is a load balancer functionality. So if you have 3 Pods of the same application, you can use the same service to handle communication with all 3 pods.
Configuring the Kubernetes cluster
How do we actually create those components, like Pods and Services in Kubernetes cluster?
Al the configuration in Kubernetes cluster, like creating or updating a pod or a service, actually goes through a Master Node with the process called API server, which we mentioned briefly earlier.
Kubernetes clients, like Kubernetes dashboard, Kubernetes API or a command line tool kubectl, all talk to the API server. Using these clients you can send configuration requests to the API server, which is the only entry point into the cluster.
These requests have to be either in YAML format or JSON format.
- Example Configuration
To the right you can see how an example configuration in YAML format looks like.
With this configuration we are sending a request to Kubernetes to configure a component called Deployment, which is essentially a blueprint for creating Pods and that blueprint is defined in the template attribute.
In this specific configuration example we tell Kubernetes to create 2 replica Pods for us, called "my-app" with each Pod replica having a container based on an "my-image" image running inside. In addition to that, we configure what the environment variables and the port configuration of this container inside of the Pod should be.
apiVersion: apps/v1
kind: Deployment
metadata:
  name: my-app
spec:
  replicas: 2
  selector:
    matchLabels:
      app: my-app
  template:
    metadata:
      labels:
        app: my-app
    spec:
      containers:
        - name: my-container
          image: my-image
          ports:
            - containerPort: 8080
          env:
            - name: ENV_VAR_1
              value: "value1"
            - name: ENV_VAR_2
              value: "value2"
In this manifest file, we have specified a Deployment named "my-app" with two replicas. The selector matches the label app: my-app to ensure that both replicas are created with this label. Inside the template section, we define the Pod specification with the label app: my-app as well.
We then define a container named "my-container" with the "my-image" image, exposing port 8080. We also set two environment variables, ENV_VAR_1 and ENV_VAR_2, with values "value1" and "value2", respectively.
To apply this manifest file to your Kubernetes cluster, save the code above to a file named my-app-deployment.yaml, and run the following command:
kubectl apply -f my-app-deployment.yaml
This will create the two replicas of the "my-app" Pod with the specified container and configuration. You can verify that the Pods have been created by running the following command:
kubectl get pods -l app=my-app
This should show the two replicas of the "my-app" Pod with their corresponding Pod IDs and statuses.